

How to Book a Ride with Niagara Transit Plus
A screen-by-screen walkthrough. Depending on your trip, you might have a direct ride or be connected to a bus to continue your journey.
Booking a direct ride
The everyday path: sign in, set your trip, pick an option, and confirm payment.
1
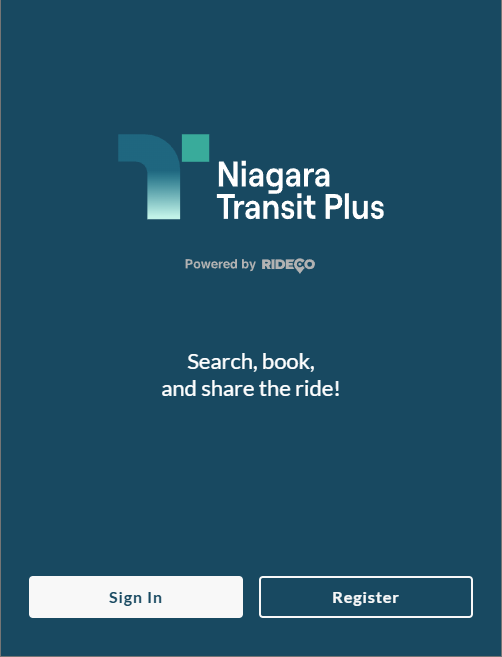
Open the app and sign in
The welcome screen loads first. Tap Sign In if you already have an account, or Register to create one.
2
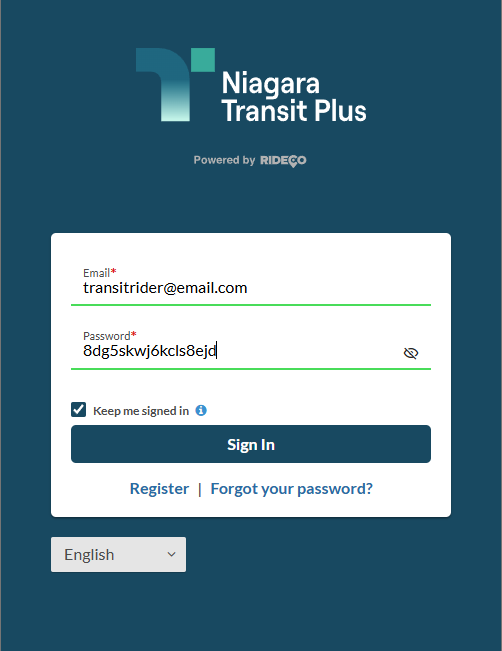
Enter your email and password
Type your email and password. Check Keep me signed in to skip logging in next time, then tap Sign In.
3
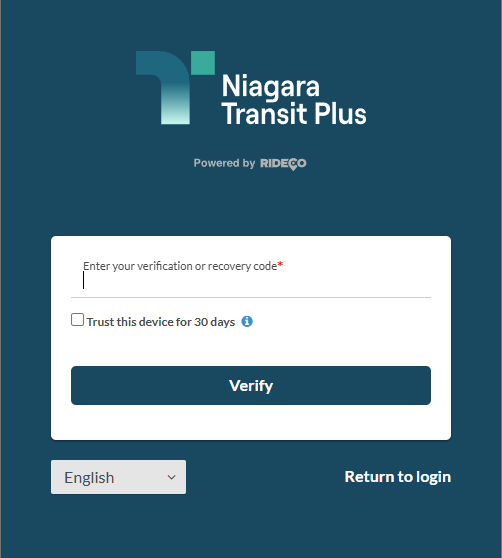
Enter your verification code
The app uses two-factor authentication. Open your authenticator app (e.g., Google Authenticator or Microsoft Authenticator), find the 6-digit code, and enter it. Check Trust this device for 30 days to skip this step on your own device, then tap Verify.
4
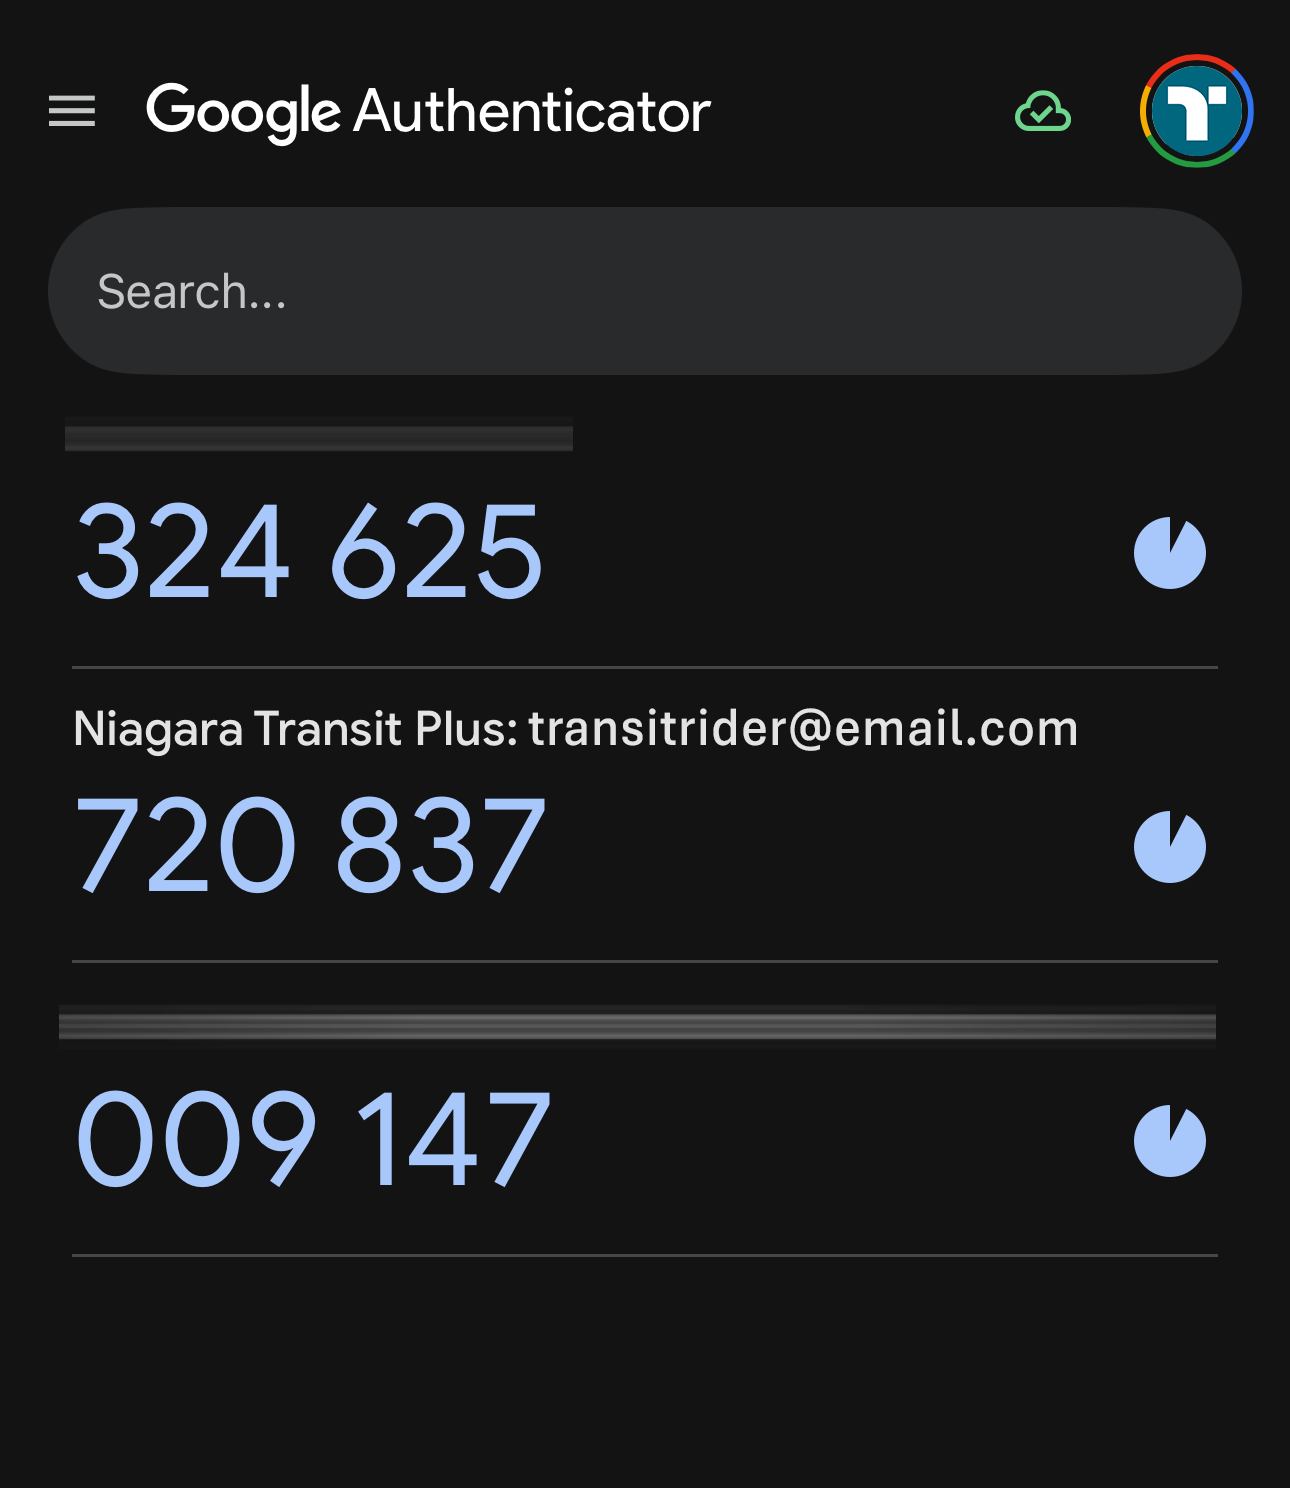
Where to find that code
Your authenticator app lists a Niagara Transit Plus entry tied to your email. Copy the current 6-digit code before it refreshes and use it on the verification screen.
5
Set up your trip
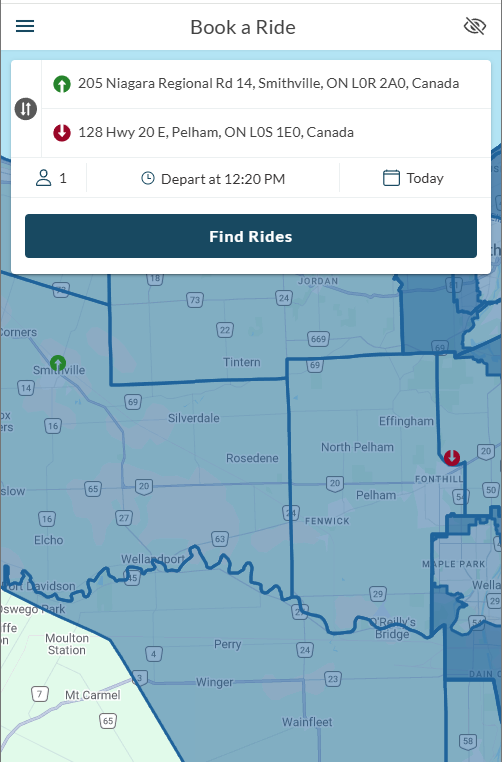
The Book a Ride screen shows a map and a trip card. Set four things:
- Pick-up location
- Drop-off location
- Number of riders
- Time and date
Tap any field to change it.
6
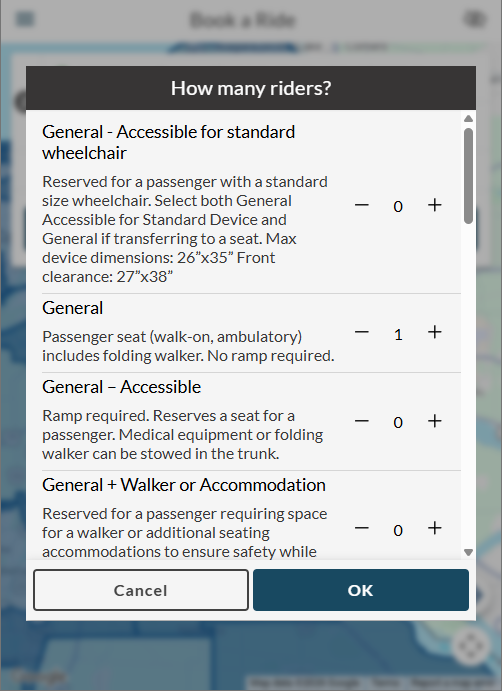
Choose the passenger type and how many riders
Pick the passenger type that fits you and use the plus and minus buttons to set the count.
Options include General, accessibility types, Senior 65+, Youth, and child seating. Some need ID or specific equipment, so read the description. Tap OK.
7
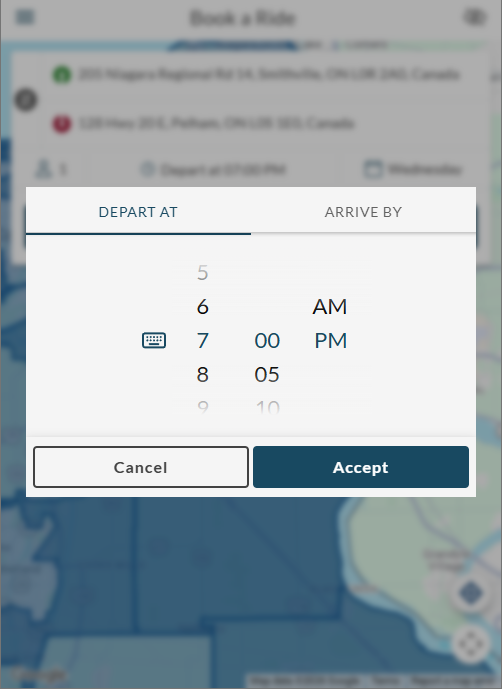
Set the time
The picker has two tabs: Depart At to leave at a set time, or Arrive By to land before a deadline. Spin the wheels, then tap Accept.
8
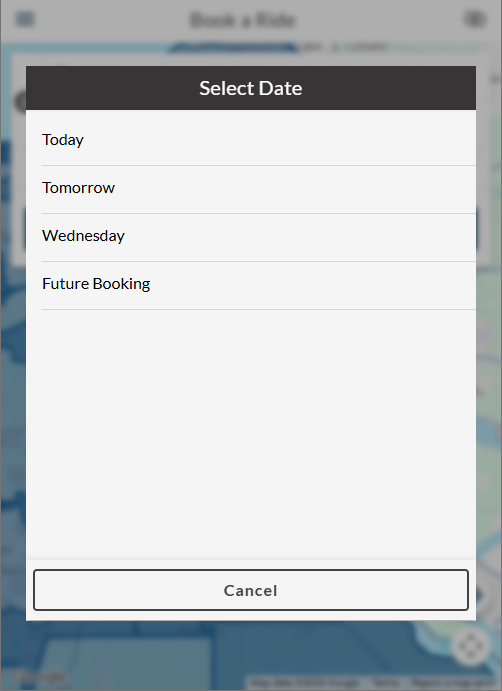
Set the date
Quick options appear: Today, Tomorrow, the next named day, or Future Booking. Pick one, or choose Future Booking to open the calendar.
9
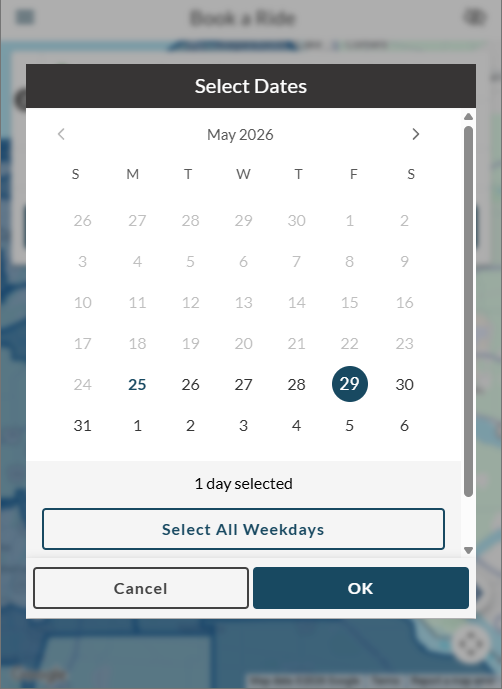
Pick a date on the calendar
Tap the day you want. You can select a single day or use Select All Weekdays for a repeating trip. Tap OK.
10
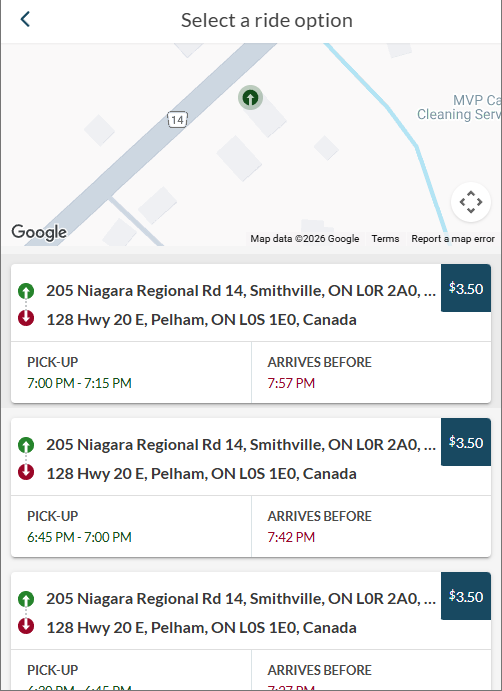
Find rides and choose an option
Back on Book a Ride, tap Find Rides. The app lists options under Pick-Up Spots, each showing the pick-up window, arrival time, and fare. Switch to Drop-Off Spots to sort by destination instead. Tap the one you want.
11
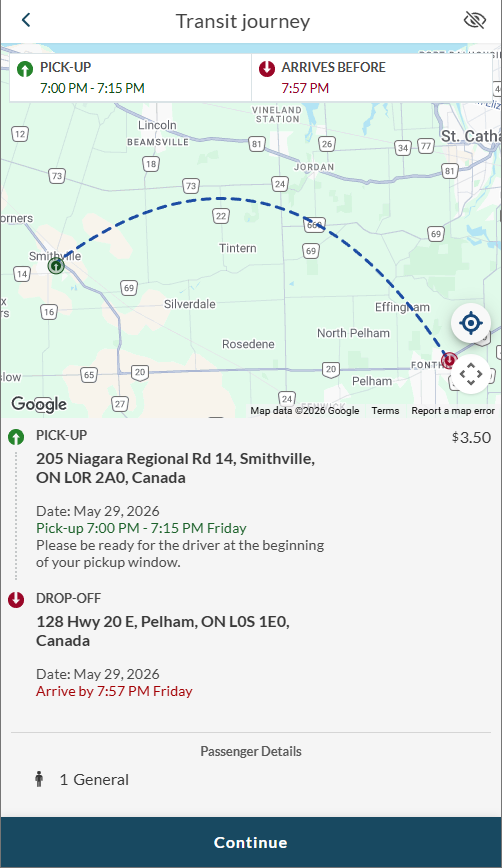
Review the transit journey
This screen maps your route with full pick-up and drop-off details: addresses, date, pick-up window, and arrival time. Be ready for the driver at the start of your window. Tap Continue.
12
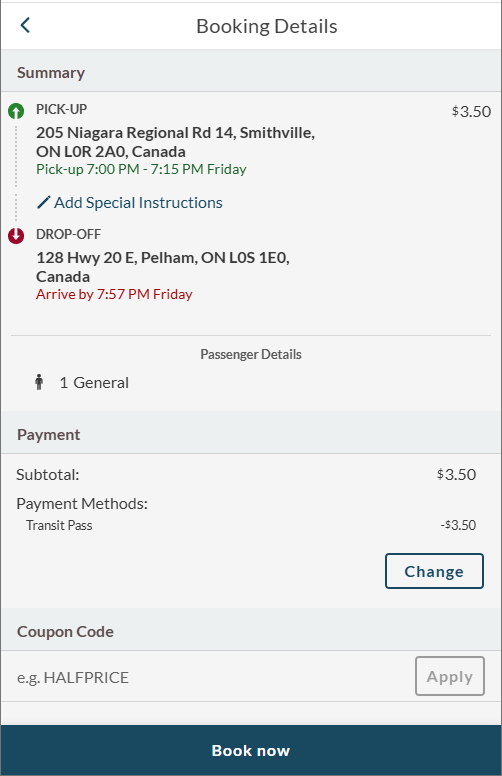
Confirm booking details
The Booking Details screen summarizes your trip and payment. Here you can add special instructions, review the fare, change your payment method, or apply a coupon code.
13
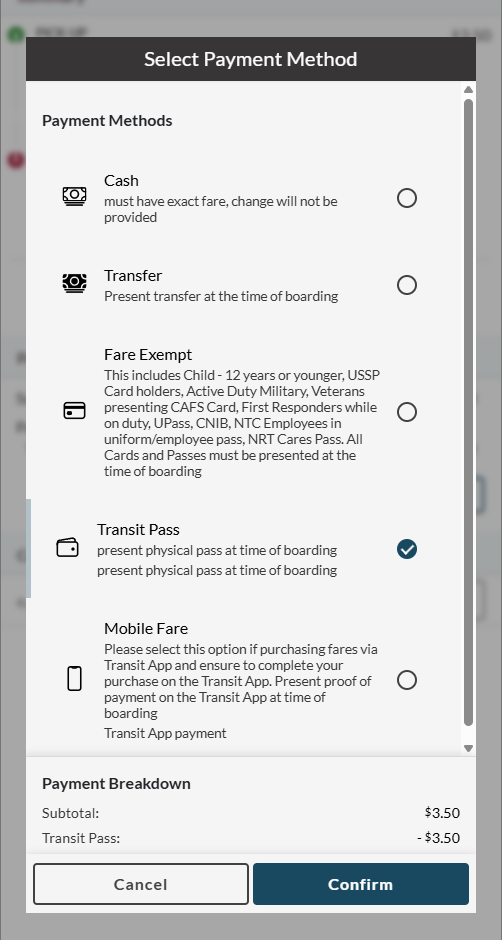
Choose a payment method and book
Tapping Change opens the payment list: Cash, Transfer, Fare Exempt, Transit Pass, and Mobile Fare. Each has rules for what to show the driver. Select one, tap Confirm, then tap Book now to finish.
When your trip needs a bus connection
Some trips can't be done in one direct ride. The app routes you with a mix of microtransit and city buses. Booking is the same through Find Rides, but the results look different.
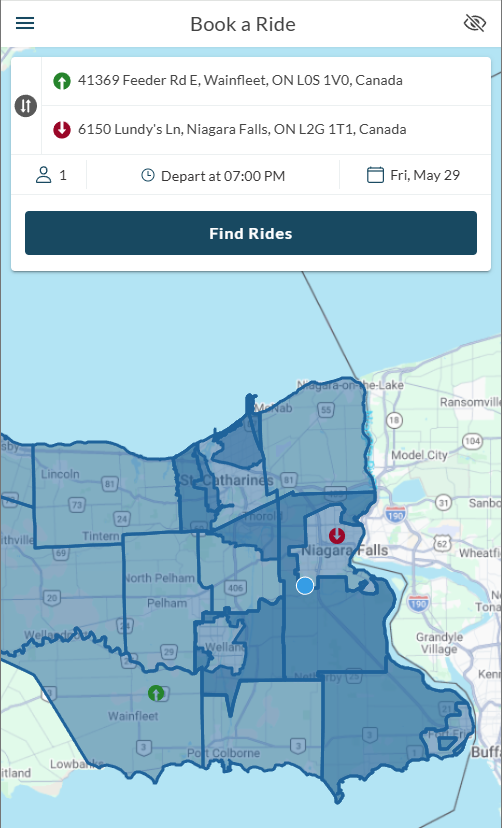
A
Set up the trip as usual
You build the trip the same way: pick-up, drop-off, riders, time, and date. The difference shows up only after you tap Find Rides, when the route spans areas a single ride can't cover.
B
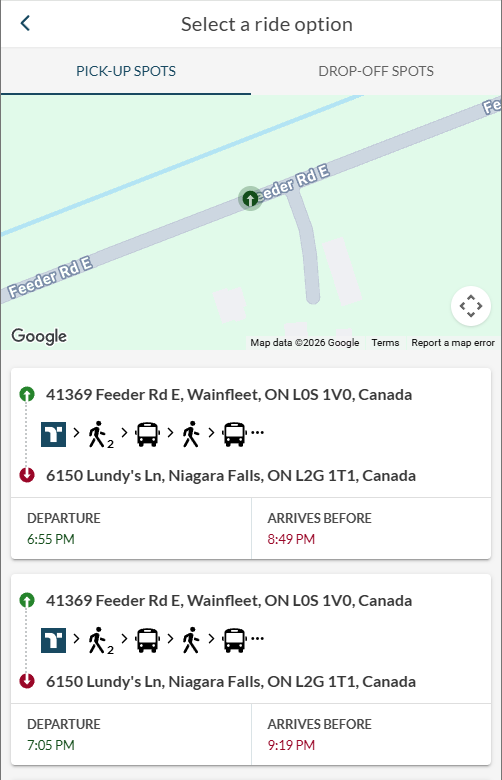
Read the connected ride options
Instead of one direct trip, each option shows a chain of icons — a walking figure, a bus, and more — meaning you'll transfer between modes. Each still lists a departure and an arrival time. Tap the option that works for you.
C
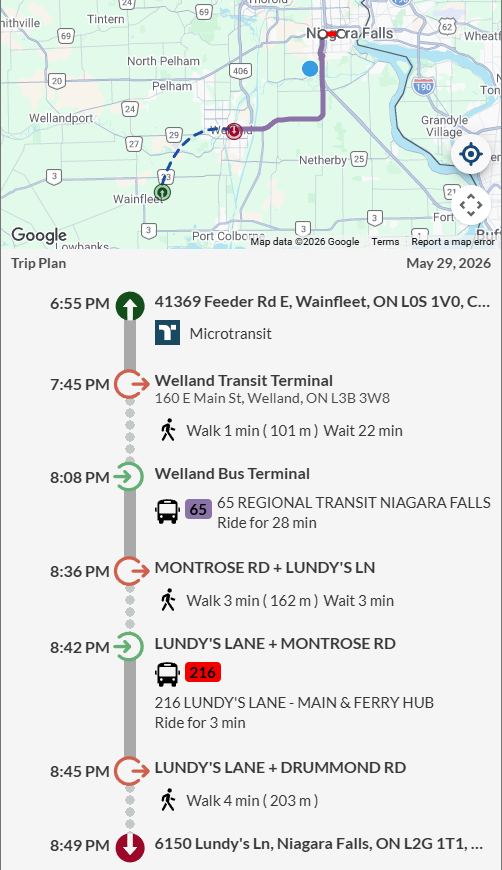
Review the step-by-step trip plan
The journey screen lists every leg with its time: a microtransit pick-up, a walk and wait at a transfer point, a numbered city bus, more walking, and the final stretch to your destination.
A notice reminds you that live timing refreshes periodically. If the data looks stale, resubmit your search, and check the transit agency's resources for current fares. Tap Continue, then finish like a standard ride.
When the app can't offer a ride
Sometimes, no ride matches the trip you requested.
!
What you'll see and what to do
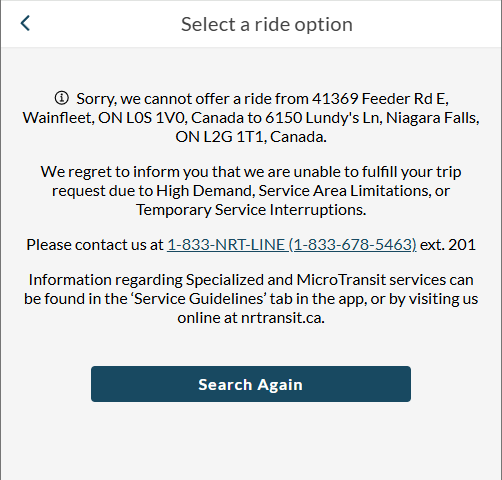
Instead of ride options, you get a message that the app cannot offer a ride between your two points. This happens because of high demand, service area limits, or temporary service interruptions.
- Tap Search Again to try a different time, date, or location.
- Call the number on screen for help booking by phone.
- Check the Service Guidelines tab or the transit website for specialized and microtransit service info.
Managing and tracking your ride
Once a trip is booked, you can book a return leg, find it again later, and track the vehicle on the day of travel.
D
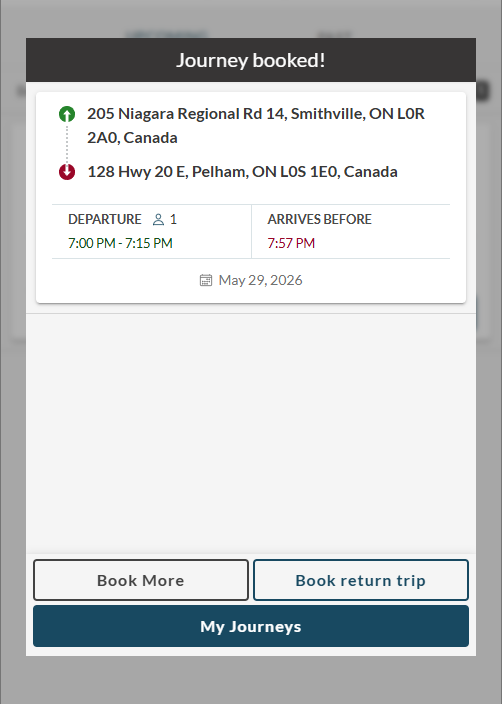
Journey booked
A confirmation screen shows your trip is set, with the pick-up and drop-off times and date. From here, you can tap Book More for another trip, Book a return trip to set up the ride home, or My Journeys to see all your bookings.
E
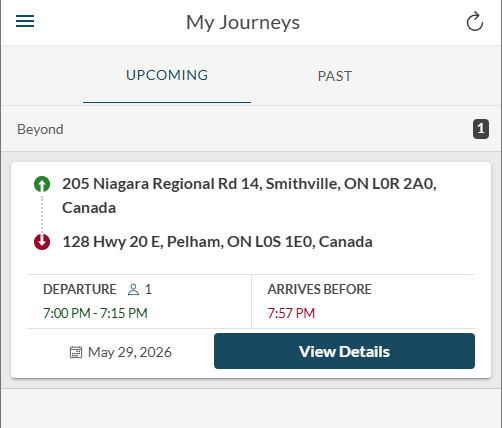
My Journeys
This screen lists your trips under two tabs: Upcoming and Past. Each entry shows the pick-up, drop-off, departure window, arrival time, and date. Tap View Details on any trip to open it.
F
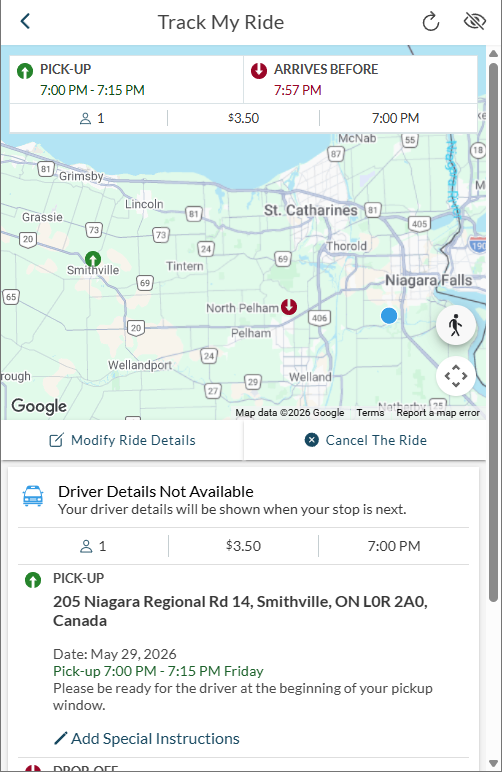
Track My Ride
On the day of your trip, this screen maps the route and follows your ride. You can tap Modify Ride Details to change the booking or Cancel The Ride to call it off.
Driver details stay hidden until your stop is next, then appear on this screen. You can still add special instructions for the driver here.
Quick Tips
Book early
Earlier searches give you more ride options and pick-up windows.
Use Arrive By
Choose it when you have a hard deadline, like an appointment.
Be ready early
Wait at the start of your pick-up window, not the end.
Keep your codes handy
You need an authenticator code each time you sign in on an untrusted device.
Have payment ready
Show your pass or fare to the driver. Cash riders need exact change.
Cancelling
Cancel trips at least 4 hours before pickup to avoid penalties.